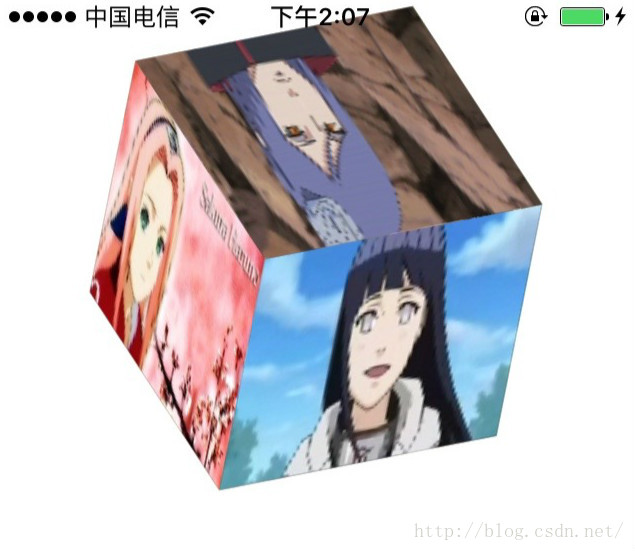
效果如下,一个3D旋转支持缩放点击事件的效果

先简单介绍 Transfrom3D的一些方法
1.针对偏移量设置 CATransform3DMakeTranslation(x,y,z)
x :x轴偏移位置 向下正数
y :y轴偏移位置 向右正数
z :z轴偏移位置 向外正数
2.针对缩放设置 CATransform3DMakeScale(x,y,z)
x y z 分别对应方向的缩放
3.针对旋转设置
CATransfrom3DMakeRotation(angle,x,y,z)
angle 旋转弧度 iOS 中所有的都是指弧度(注意)
x,y,z 分别沿各轴方向旋转 取值 -1 ------ 1
4.针对叠加设置
CATransfrom3DMakeRotate(transfrom3D,angle,x,y,z)
一个类似于叠加
transfrom3D 经过变换之后的 上述几个返回的都是transfrom3D类型的
angle 旋转弧度
x,y,z 旋转
5.具体实现思路
1)构建正方体 调整旋转偏移的位置
2)设置每个面显示的内容
//正
[self addCubeLayer:@[@0, @0, @(_side/2), @0, @0, @0, @0,@"hinata.jpg"]];
//背
[self addCubeLayer:@[@0, @0, @(-_side/2), @(M_PI), @0, @0, @0,@"konan.jpg"]];
//左
[self addCubeLayer:@[@(-_side/2), @0, @0, @(-M_PI_2), @0, @1, @0,@"sakula.jpg"]];
//右
[self addCubeLayer:@[@(_side/2), @0, @0, @(M_PI_2), @0, @1, @0,@"tenten.jpg"]];
//上
[self addCubeLayer:@[@0, @(-_side/2), @0, @(-M_PI_2), @1, @0, @0,@"konan.jpg"]];
//下
[self addCubeLayer:@[@0, @(_side/2), @0, @(M_PI_2), @1, @0, @0,@"konan.jpg"]];
CATransform3D transform3D = CATransform3DIdentity;
transform3D.m34 = -1.0/2000;
_cubeLayer.sublayerTransform = transform3D;
[self.layer addSublayer:_cubeLayer];
//添加sublayers
- (void)addCubeLayer:(NSArray *)params
{
CALayer *gradient = [CALayer layer];
gradient.contentsScale = [UIScreen mainScreen].scale;
gradient.bounds = CGRectMake(0, 0, _side, _side);
gradient.position = self.center;
gradient.contents = (id)[UIImage imageNamed:params[7]].CGImage;
//抗锯齿
gradient.shouldRasterize = YES;
CATransform3D trans3D = CATransform3DMakeTranslation([params[0] floatValue], [params[1] floatValue], [params[2] floatValue]);
CATransform3D rotate3D = CATransform3DRotate(trans3D , [params[3] floatValue], [params[4] floatValue], [params[5] floatValue], [params[6] floatValue]);
CATransform3D transform3D = rotate3D;
gradient.transform = transform3D;
[_cubeLayer addSublayer:gradient];
}
3)添加手势
[self addGestureRecognizer:[[UIPanGestureRecognizer alloc] initWithTarget:self action:@selector(panRotate:)]];
UIPinchGestureRecognizer *pinchRecognizer = [[UIPinchGestureRecognizer alloc] initWithTarget:self action:@selector(scale:)];
[pinchRecognizer setDelegate:self];
[self addGestureRecognizer: pinchRecognizer];
UITapGestureRecognizer *tapRecognizer = [[UITapGestureRecognizer alloc] initWithTarget:self action:@selector(tapRecogn:)];
[tapRecognizer setDelegate:self];
[self addGestureRecognizer: tapRecognizer];
#pragma mark - PanGesture
- (void)panRotate:(UIPanGestureRecognizer *)ges
{
static CGPoint start;
if (ges.state == UIGestureRecognizerStateBegan) {
start = [ges locationInView:self];
} else if (ges.state == UIGestureRecognizerStateChanged) {
CATransform3D transform = _cubeLayer.sublayerTransform;
_rotMatrix = GLKMatrix4MakeWithArray((void *)&transform);
CGPoint loc = [ges locationInView:self];
CGPoint diff = CGPointMake(start.x-loc.x, start.y-loc.y);
float rotX = 1 * GLKMathDegreesToRadians(diff.y/2.0);
float rotY = -1 * GLKMathDegreesToRadians(diff.x/2.0);
bool isInvertible;
GLKVector3 xAxis = GLKMatrix4MultiplyVector3(GLKMatrix4Invert(_rotMatrix, &isInvertible),
GLKVector3Make(1, 0, 0));
_rotMatrix = GLKMatrix4Rotate(_rotMatrix, rotX, xAxis.x, xAxis.y, xAxis.z);
GLKVector3 yAxis = GLKMatrix4MultiplyVector3(GLKMatrix4Invert(_rotMatrix, &isInvertible),
GLKVector3Make(0, 1, 0));
_rotMatrix = GLKMatrix4Rotate(_rotMatrix, rotY, yAxis.x, yAxis.y, yAxis.z);
_cubeLayer.sublayerTransform = *((CATransform3D *)&_rotMatrix);
start = loc;
}
}
-(void)scale:(id)sender {
if([(UIPinchGestureRecognizer*)sender state] == UIGestureRecognizerStateBegan) {
_lastScale = 1.0;
}
if ([(UIPinchGestureRecognizer*)sender state] == UIGestureRecognizerStateChanged) {
//Scale的仿射变换,只改变缩放比例,其他仿射变换底下会说
// CGAffineTransform newTransform = CGAffineTransformScale(currentTransform, scale, scale);
CATransform3D newTransform = CATransform3DMakeScale([(UIPinchGestureRecognizer*)sender scale], [(UIPinchGestureRecognizer*)sender scale], [(UIPinchGestureRecognizer*)sender scale]);
_cubeLayer.sublayerTransform = newTransform;
_lastScale = [(UIPinchGestureRecognizer*)sender scale];
}
}
-(void)tapRecogn:(id)sender {
UIAlertController *alert = [UIAlertController alertControllerWithTitle:@"描述" message:@"这是一张图片" preferredStyle:UIAlertControllerStyleAlert];
UIAlertAction *action1 = [UIAlertAction actionWithTitle:@"确定" style:UIAlertActionStyleDefault handler:nil];
UIAlertAction *action2 = [UIAlertAction actionWithTitle:@"取消" style:UIAlertActionStyleCancel handler:nil];
[alert addAction:action1];
[alert addAction:action2];
[self.window.rootViewController presentViewController:alert animated:YES completion:nil];
}
至此完成