1 课程内容介绍
我之前写的的一篇博客Spring核心功能DI(依赖注入)xml篇主要介绍了如何通过配置xml的方式来实现依赖注入,今天我们来介绍如何通过注解方式完成我们的依赖注入操作。
2 注入基本类型
- 创建用户类为其添加name和age的成员属性并为其提供get set方法(set方法可以没有)
- 在User上声明@Component标签将其声明为Spirng的bean
- 通过@Value标签为name和age注入具体的值
代码如下:
@Component()
public class UserAnnotation {
	private static Logger log = LoggerFactory.getLogger(UserAnnotation.class);
	@Value(value = "zhuoqianmingyue2")
	private String name;
	@Value(value = "19")
	private Integer age;
	....省略 get and set  方法
}
进行测试:
package cn.zhuoqianmingyue.ioc.di.annotation;

import java.util.List;
import java.util.Map;
import java.util.Set;

import org.junit.Test;
import org.junit.runner.RunWith;
import org.slf4j.Logger;
import org.slf4j.LoggerFactory;
import org.springframework.beans.factory.annotation.Autowired;
import org.springframework.test.context.ContextConfiguration;
import org.springframework.test.context.junit4.SpringRunner;

@RunWith(SpringRunner.class)
@ContextConfiguration(locations= {"classpath:ioc-di-context.xml"})
public class UserPropertyDITest {
	private static Logger log = LoggerFactory.getLogger(UserPropertyDITest.class);
	@Autowired
	private UserAnnotation userAnnotation;
	@Test
	public void diBaseProperty() {
		log.info(userAnnotation.getName()+"#"+userAnnotation.getAge());
	}
}


需要注意的是Spirng配置文件ioc-di-context.xml中要声明注解扫描的路径具体配置如下:
<context:component-scan base-package=“cn.zhuoqianmingyue”></context:component-scan> cn.zhuoqianmingyue 你的声明注解的包路径 一般建议用最外层路径
3 注入引用类型
- 首先为UserAnnotation 类创建类成员属性CountryAnnotation 并为其添加@Component()将其声明为Spirng的Bean
具体代码如下:
@Component()
public class CountryAnnotation {
	private String name = "加拿大";

	public String getName() {
		return name;
	}

	public void setName(String name) {
		this.name = name;
	}
}
- 将CountryAnnotation类 声明为UserAnnotation 类的成员属性然后添加get set方法(set方法可以没有),在通过@Autowired标签将其注入到UserAnnotation 类中。
@Component()
public class UserAnnotation {
	@Autowired
	private CountryAnnotation countryAnnotation;
}
进行测试:
	@Test
	public void diClassProperty() {
		log.info(userAnnotation.getCountryAnnotation().getName());
	}

4 注入List
通过注解注入list set map 需要通过 @Configuration 和@Bean标签来完成。
首先创建声明@Configuration的类 然后创建获取List的方法并在方法上声明@Bean然后在方法内创建的list以及添加list的元素。
具体代码如下:
package cn.zhuoqianmingyue.ioc.di.annotation;

import java.util.ArrayList;
import java.util.List;

import org.springframework.context.annotation.Bean;
import org.springframework.context.annotation.Configuration;

@Configuration
public class AddressListConfig {
	@Bean(name= {"addressList"})
	public List<String> getString() {
		List<String>  addressList = new ArrayList<String>() {{add("上海");add("广州");}};
		return addressList;
	}
}
在UserAnnotation 类中创建List的成员属性,并为其提供get set方法(set方法可以没有),然后再List成员属性上声明@Autowired
示例代码如下:
@Component()
public class UserAnnotation {
	@Autowired
	private List<String> addressList;
	.....省略get set方法
}
进行测试:
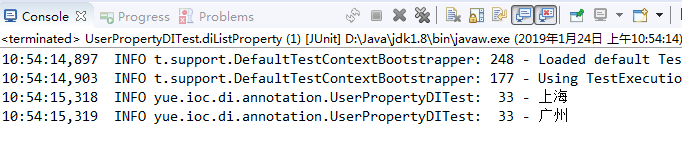
	@Test
	public void diListProperty() {
		List<String> addressList = userAnnotation.getAddressList();
		addressList.forEach((addr)->{
			log.info(addr);
		});
	}
需要注意的是当我们配置类中有多个@Bean声明的方法时 @Bean标签中的name要和UserAnnotation 类中成员属性名称一定要一致
如果我们将在配置类中添加2个声明@Bean的方法 名称分别为@Bean(name= {“addressList1”}) @Bean(name= {“addressList2”}) UserAnnotation类中成员属性名称为 addressList会报如下错误:
中的addressList改成addressList1报如下错误:Caused by: org.springframework.beans.factory.NoUniqueBeanDefinitionException: No qualifying bean of type ‘java.util.List<java.lang.String>’ available: expected single matching bean but found 2: addressList2,addressList1
5 注入Set
注入Set 和注入List操作方式是一样这里就不过多的阐述了的
具体代码如下:
将自定义Set集合数据交于Spring管理.
package cn.zhuoqianmingyue.ioc.di.annotation;

import java.util.HashSet;
import java.util.Set;

import org.springframework.context.annotation.Bean;
import org.springframework.context.annotation.Configuration;

@Configuration
public class AddressClassSetConfig {
	@Bean("addressClassSet")
	public Set<AddressAnnotation> getAddressClassSet(){
		Set<AddressAnnotation> set = new HashSet<AddressAnnotation>();
		AddressAnnotation addr = new AddressAnnotation();
		addr.setName("重庆");
		AddressAnnotation addr2 = new AddressAnnotation();
		addr2.setName("西藏");
		set.add(addr);
		set.add(addr2);
		return set;
	}
}
在UserAnnotation 声明Set成员属性然后提供get set方法(set方法可以没有), 并为其声明@Autowired注解 将其注入UserAnnotation 中。
@Component()
public class UserAnnotation {
	private static Logger log = LoggerFactory.getLogger(UserAnnotation.class);
	@Autowired
	private Set<AddressAnnotation> addressClassSet;
}
进行测试:
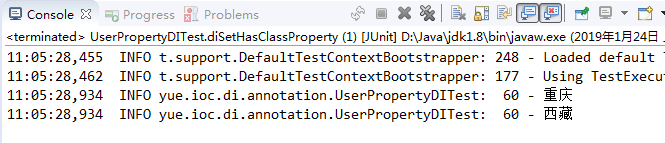
	@Test
	public void diSetHasClassProperty() {
		Set<AddressAnnotation> address2Class = userAnnotation.getAddressClassSet();
		address2Class.forEach((addr)->{
			log.info(addr.getName());
		});
	}
6 注入Map
注入Map 和注入List和Set操作方式是一样这里就不过多的阐述了的
具体代码如下:
将自定义Map数据集合交于Spring。
package cn.zhuoqianmingyue.ioc.di.annotation;

import java.util.HashMap;
import java.util.Map;

import org.springframework.context.annotation.Bean;
import org.springframework.context.annotation.Configuration;

@Configuration
public class AddressClassMapConfig {
	@Bean("addressClassMap")
	public Map<String,AddressAnnotation> getAddressClassMap(){
		Map<String,AddressAnnotation> map = new HashMap<String,AddressAnnotation>();
		AddressAnnotation addr1 = new AddressAnnotation();
		addr1.setName("北京");
		AddressAnnotation addr2 = new AddressAnnotation();
		addr2.setName("上海");
		map.put("BEIJING", addr1);
		map.put("SHANGHAI", addr2);
		return map;
	}
}
在UserAnnotation 声明Map 成员属性然后提供get set方法(set方法可以没有),并为其声明@Autowired注解 将其注入UserAnnotation 中
@Component()
public class UserAnnotation {
	@Autowired
	private Map<String,AddressAnnotation> addressClassMap;

}
进行测试:
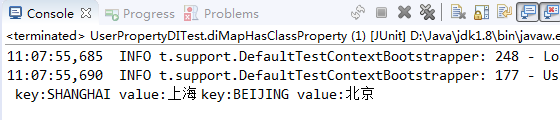
	@Test
	public void diMapHasClassProperty() {
		Map<String, AddressAnnotation> addressClassMap = userAnnotation.getAddressClassMap();
		addressClassMap.forEach((k, v)->{
			System.out.print(" key:"+k+" value:"+v.getName());
		});
	}
转载自原文链接, 如需删除请联系管理员。
原文链接:Spring DI(依赖注入)注解篇,转载请注明来源!